Converting Assets to a VPM Package
Starting Point
You've made an Editor Tool, Prefab or something else which is meant to be used alongside the VRChat SDK. You distribute it as a .unitypackage or .zip file which you and other users import into their projects after importing all the related SDK packages like the Worlds SDK and UdonSharp.
Changes Needed
In order to work as a VPM Package, your code and assets need some changes. The Package Maker tool will handle a lot of this, but not everything:
- Be completely separated into Editor and Runtime folders. Anything that uses UnityEditor classes needs to be in the Editor folder.
- Have a compatible Package Manifest which includes the vpmDependencies for the related VRChat SDK packages.
- Replace any paths hardcoded to a path "Assets/YourPackageName" to use your Package path instead - see Converting Asset Paths below.
- Provide Assembly Definition files for all the scripts in your package.
Package Maker Tool
We provide this tool to ease the transition. The steps below will guide you in making a new Project to create and manage a VPM-compatible package from existing assets.
Visit the VPM Package Template repository on GitHub and press "Use this Template" to create a new package repository under your own account.
Clone the repo using git, or download it from Code > Download zip.
Open the new project in Unity.
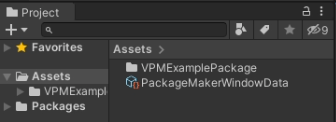
Import your package into this new project, into the Assets folder as you would if it were a .unitypackage-style project.
Open the Package Maker Tool window from the menu option
VRChat SDK / Utilities / Package Maker.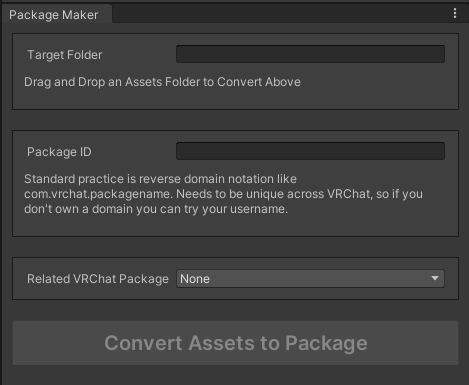
In the "Project" panel, find the parent folder with all your packages' assets from within the Assets folder, and Drag and drop it into the "Target Folder" field of the window.

Enter an ID for your package in the Package Maker's "Package ID" field. The standard practice for is reverse domain notation like com.vrchat.packagename, using a domain you own. It needs to be unique across VRChat to play nice with other packages, so if you don't own a domain you can try your username.
If your package requires any VRChat SDK packages, choose the most fitting one from the "Related VRChat Package" dropdown.
Once you have a valid Target Folder and Package ID chosen, the "Convert Assets to Package" button will be enabled. Press it now.
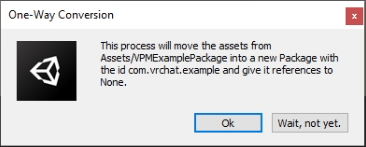
The tool will present a confirmation dialog about the permanent changes it's about to make. Read through them and confirm it to perform the migration or cancel it to go back and change something.
After confirming, a progress bar will appear as the migration is performed. First, the tool will create the proper file and folder layout for your package within your project's "Packages" directory. Then it will move all the files into their corresponding folders. Anything that was in an "Editor" folder in your Assets, even if it was nested down several layers, will be moved into the top-level Editor folder in your package. All other files will be moved into the Runtime folder.
If you have Auto-Refresh turned off in Unity, you will need to Refresh at this point by pressing Ctrl-R. At this point, your package may be all migrated and properly working. You can safely remove the Package Maker Tool and related "PackageMakerWindowData.asset" file from your project.
If your project has errors at this point, you may need to do some troubleshooting.
Customizing Your Package
Once your package has been created, you can modify the Name, Description etc by selecting the 'package.json' file in the Project window from Packages/YourPackageName/package.json.
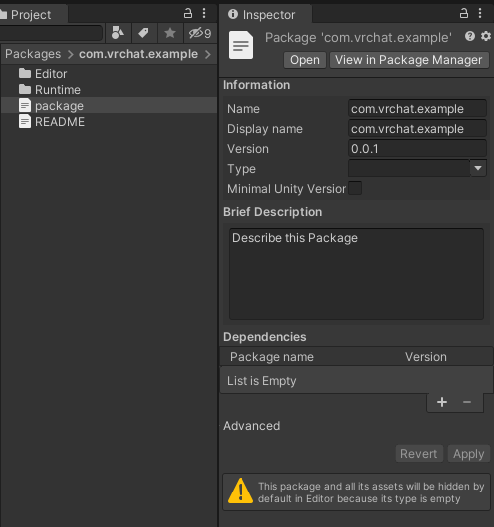
You can change the Display Name (ie VRChat - Worlds instead of com.vrchat.worlds), version, description, unity package dependencies, etc. here. If you change the 'Name' of the package, then your Assembly References might break, since they refer to the name of your package entered when it was migrated.
Automation
Check out the Readme in the Package Template Repo to learn how to easily set up automation that builds and stores new versions of your package for you!
Troubleshooting Migration Issues
Converting Asset Paths
If your package expects to find and load files from itself, those paths may need to be updated. For example, if you have an Editor Window which loads a stylesheet, you might have the following code :
var styleSheet = AssetDatabase.LoadAssetAtPath<StyleSheet>("Assets/MyPackage/Editor/MyPackageStyle.uss");
This will no longer work because that file is no longer in the Assets folder. There are two ways to handle this - you can convert the item to a Resource, or convert the path to work from within your package. Here are examples of both approaches.
Converting to a Resource
Resources can be loaded from any folder without knowing the actual path. Unity looks in every folder called "Resources" within both your Assets and Packages folders.
- Create a folder called "Resources" within our new Package folder, under the top-level "Editor" folder.
- Move the file "MyPackageStyle.uss" to this resources folder.
- Switch from
AssetDatabase.LoadAssetAtPathtoResources.Loadlike this:
var styleSheet = Resources.Load<StyleSheet>("MyPackageStyle");
Note that the filename has the extension removed above - so if any of your resources share the same name with different extensions, you'll need to rename one of them.
Using GUIDs
Figure out the GUID of your asset and then ask the AssetDatabase to convert from GUID to AssetPath like this:
string styleSheetPath = AssetDatabase.GUIDToAssetPath("de965059f7f21034b8c112bfc7a0dc5f");
var styleSheet = AssetDatabase.LoadAssetAtPath<StyleSheet>(styleSheetPath);
Other Issues
If you come across a change needed due to the migration, file an issue here so we can add the information to this page!