Getting Started
This guide will show you how to install the VRChat Creator Companion (VCC) and how to use it for the first time. Here's what you'll need:
- A PC that fulfills the Unity Editor system requirements
- Windows 10/11 for the full GUI or Linux/macOS for a command-line interface.
- An internet connection
Download
The Creator Companion is available at https://vrchat.com/home/download.
You can always download the latest version from this direct URL as well: https://vrchat.com/download/vcc.
Install
Run the installer from the above step, which will install the Creator Companion into your "%LOCALAPPDATA%\Programs" folder by default (e.g. C:\Users\UserName\AppData\Local\Programs). You can change this during installation if you like. You can delete the installer once the installation is complete.
Set Up
The Creator Companion will check that Unity is installed on launch. If it is needed, you'll see a button to help you install Unity Hub and the Unity Editor. By following the installation instructions inside the Creator Companion, you will get the latest version of the Unity Hub and the current VRChat-SDK-Compatible version of Unity.
To install Unity Hub, follow these steps.
Unity Installation Issues
- Make sure to activate your Unity license after installing it.
- Unity and Unity Hub usually require admin privileges for installation. Click "Yes" when the installer asks to make changes to your system. In rare occasions, you may need to run the installer as an administrator.
- If your Unity Hub installation fails unexpectedly, you may want to view the installation log file. You can find it in
%UserProfile%\AppData\Roaming\UnityHub\logs\info-log.json. - Unity Hub may automatically prompt you to install versions of Unity that are incompatible with VRChat. You can safely skip these prompts.
The Creator Companion is only fully-supported on Windows 10 (Windows 11 may work but is not fully tested). The CLI has some functionality on Mac and Linux.
Unity Editor Versions
The Creator Companion requires our currently Supported Unity Version. If you have Unity Hub installed, the Creator Companion can install it automatically for you.
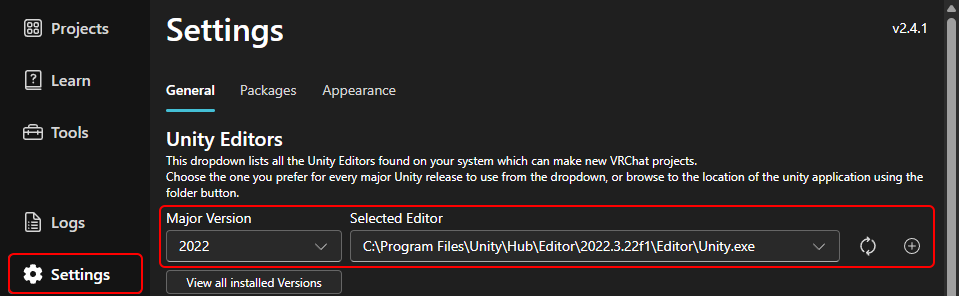
If the Creator Companion cannot automatically find your installed Unity Editor, an error message will be shown. In the Creator Companion's settings page, you can use the 📁-button to browse for the Unity Editor you'd like to use.
Make New Projects
To make a new project, just press "New" from the navigation bar on the left and choose which Template you'd like to work from:
- Avatar - Makes a new project with the Avatar 3.0 SDK included for creating a VRChat Avatar.
- World - Makes a new project with the World 3.0 SDK with Udon included, as well as ClientSim for testing your worlds directly in the Editor.
- UdonSharp - Makes a new project with everything from the World template PLUS UdonSharp for writing Udon scripts in a C#-like syntax.
Migrate Existing Projects
Migrating your existing projects is covered in detail in VPM: Migrating Projects.
Updating Existing Projects
You can add existing projects to your main Project list by pressing the "Add" button from the navigation on the left. You can either choose a single project folder to add it to the list, or a folder full of projects to add each valid project found to your list (this methid will only go one level deep).